Published Date: 02-05-2019
Categorie:
Managing processing settings
Document hub
Updated on August 29, 2021
Configuring branch / location code for each addressee of your incoming invoices using VISMA.NET accounting system.
1. Manage Location code
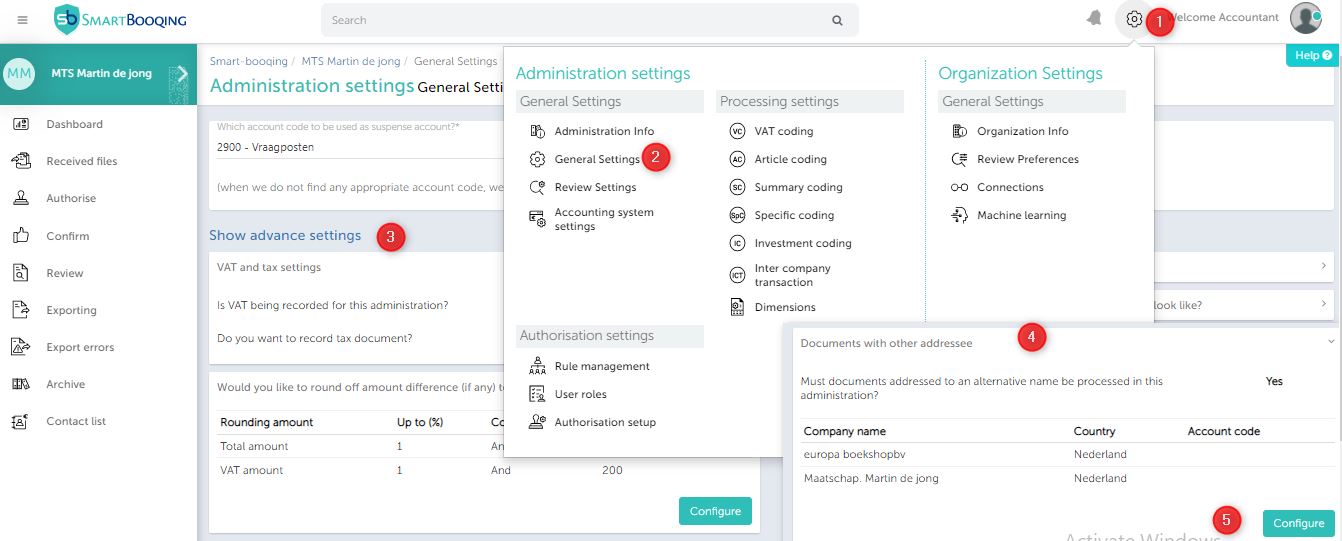
- User can select an administration and then click on Administration setting-> Basic from left navigation menu and user will be navigated to “Basic Administration settings” page.
- Onclick of “Show advance setting”, the advance setting section will be displayed.
- User will then require to click on “Configuration” button from the “Documents with other addressee” section.
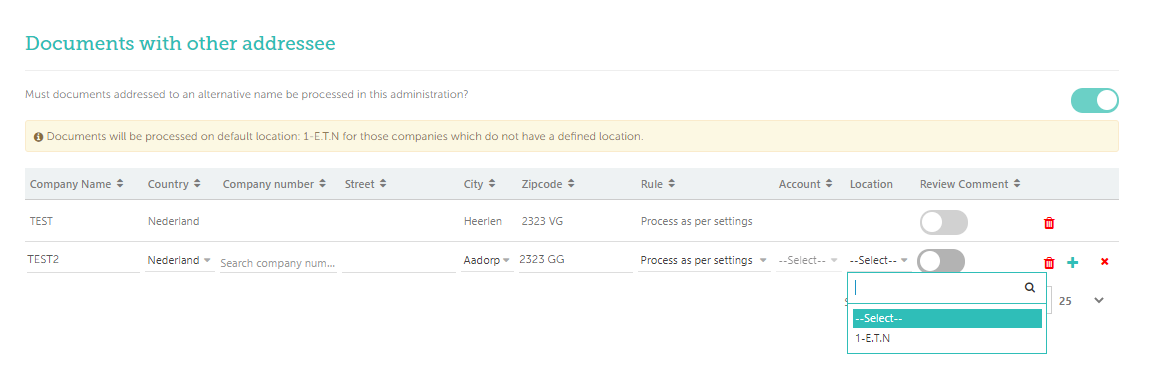
- A new field as “location code” is added on “Document with other addressee” page, where the user can select a location code against each addressee of your incoming invoices. Values of location code are imported from VISMA.
- Location code once set from settings page, will be auto-populated into DDP for new invoices so that user doesn’t have to manually select from the drop-downs for each line and header.
Note: First time you need to manually add the location code on DDP and then you can make a setting as explained above.
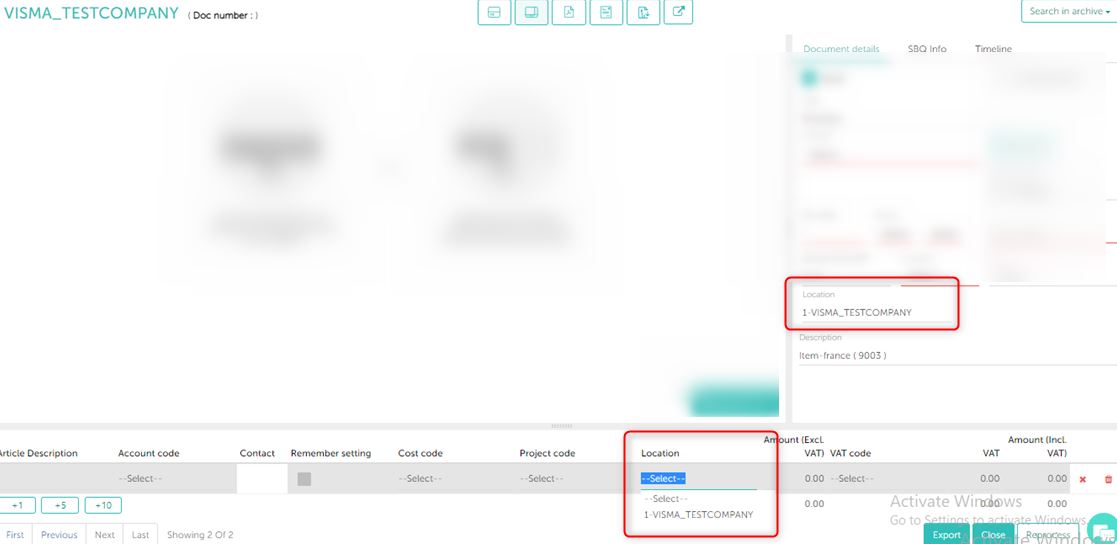
2. Document Detail Page
User can also view/ manage the “Location code” on the following sections
- Document header
- Line level section
All these location code details are also exported in VISMA.NET Accounting software.