Authorisation users works in 3 ways
1. Authorise document from website and manage authorisation settings
2. Swipe invoice from App to authorise
3. Authorise from Mail: Click on Link + PIN

1. Authorise invoices from website and manage authorisation settings
Steps to authorise invoice
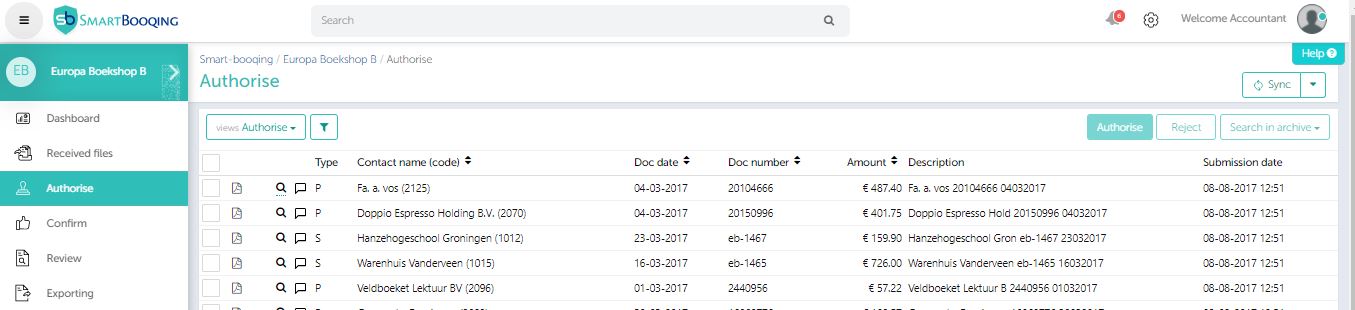
- Every invoice that falls under the rules created for Authorisation will first come in the stage of ‘Authorise’. To know more about rule click here.
- Authorise invoice
- Select document
- Click on authorise button

- Reject invoice
- Select document
- Click on reject button
- Add rejection reason and click on Ok button to reject document

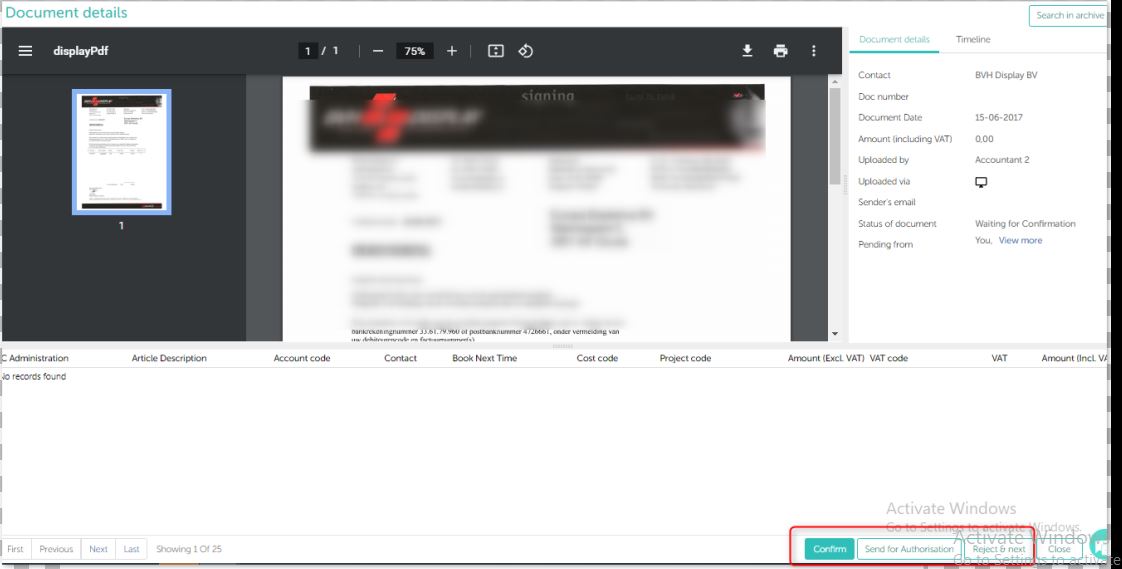
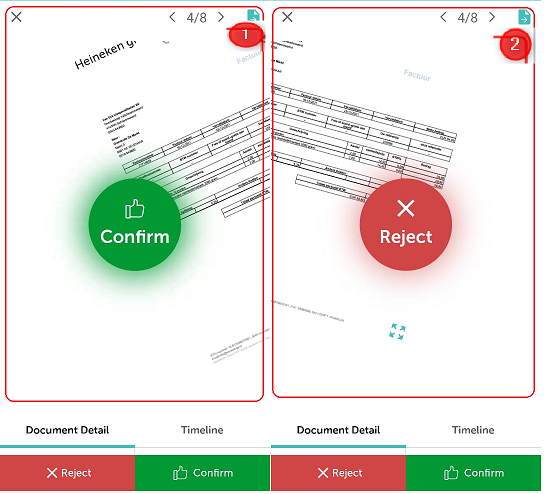
- Authorise/ Reject document from Invoice detail page: When you open the invoice you can perform the below actions:
- Click here to authorise document
- Click here to reject document
- Click here to confirm the document.
- Click here to send document for re-authorisation
- Click here to reject the document
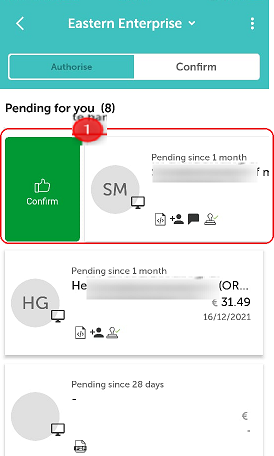
Steps to confirm invoice
- Once the document is authorised and all authorisation rules are satisfied, the documents comes for confirmation.
- Pending to confirm documents are visible to all user will confirmer role.
- Confirm invoice
- Select document
- Click on confirm button

- Reject invoice
- Select document
- Click on reject button
- Add rejection reason and click on Ok button to reject document

- Send invoice for authorisation
- Select document
- Click on send for authorisation button
- Select user name to whom you wish to send for re-authorisation and click on Ok button.

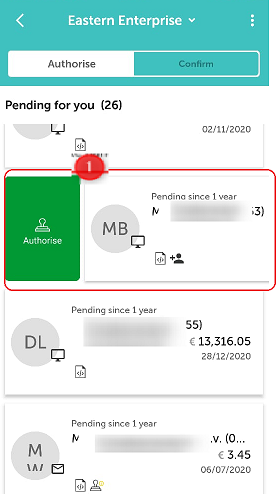
2.Swipe invoice from App to authorise/ confirm them
Authorise invoices
- Authorise/ Reject invoices
- Swipe right to authorise invoices
- Swipe left to reject invoices

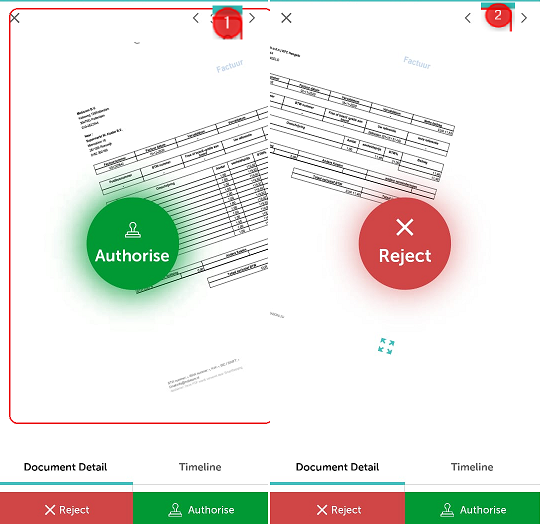
- Authorise/ Reject invoices from invoice detail page.
- Swipe right to authorise invoices
- Swipe left to reject invoices
- You can even authorise/ reject invoices with the help of action button at the bottom of screen.
Confirm invoices
- Confirm/ Reject invoices
- Swipe right to confirm invoices
- Swipe left to reject invoices

- Confirm/ Reject invoices from invoice detail page.
- Swipe right to confirm invoices
- Swipe left to reject invoices
- You can even confirm/ reject invoices with the help of action button at the bottom of screen.
3.Get pending invoices reminder on email. Quick login via PIN or Website credentials
- Once you are assigned authoriser/ confirm roles, you will start receive email for pending invoices to be authorise/ confirm as per defined rules.
- You will receive email with your pending invoices count to be authorise/ confirm. Simply you can click on ‘View documents’ link and navigate to Smartbooqing portal.
- Login via Credentials (email and password)
- You will be navigated to Smartbooqing login screen and can access with the help of your registered credentials if Smartbooqing PIN is not set
- Login via PIN
- Else if you have set Smartbooqing PIN you will be directly navigated to PIN login and can access by simple entering your registered PIN.

- After successful login you will be navigated to respective authorise/ confirm section.