In this article you will find information about:
- Authorisation – concept explanation.
- Confirmation- concept explanation.
- Icons and columns explained.
- Document detail page -Authorisation.
Stages of Authorisation:
There are two stages of the Authorisation ‘Authorise’ and ‘Confirm’. Depending on the rule set the invoices will pass through authorisation and confirmation stages.
- Stage 1- Authorise. Here the authoriser can take the following actions:
- Actions: ‘Authorise’, ‘Reject’, ‘Undo’, ‘Review’.
- Stage 2- Confirm. Here the confirmer can take the following actions:
- Actions- ‘Send for Authorisation’, ‘Confirm’, ‘Reject’, ‘Undo’ ‘Review’.’
1. Authorisation – concept explanation:
Every document/invoice that falls under the rules created for Authorisation will first come in the stage of ‘Authorise’.
Actions that can be takes:
1.1. Authorise (approve the invoice)
- All the invoices falling in any of the rules will come on ‘Authorise’ section as shown below and you can take the respective action on it as shown below
- Click on the check box and will will get the option of authorise. If you are the authoriser you can click on the authorise button. This selected invoice will go to confirmation stage.

1.2 Authorise on behalf of
You can even authorise document on behalf for other authoriser if you are a ‘Account Manager’.

You can click on the check box and reject button will be activated. You can even reject a document. The reason is mandatory for rejecting documents.
Note: ‘Account Manager’ can also authorise the invoice on behalf of the authoriser.
1.3. Reject
- Select the document you want to reject.
- Click on reject button.
- Reason is mandatory for rejecting document.

1.4. Undo
- You can Undo rejected document from Authorise–>Rejected view
- Select the document you wish to recall
- Click on ‘Undo’ button.
- Document will fall into respective stage from where it was rejected

1.5. Authorised list
The documents you authorise will be seen in ‘Authorised’ list view.

1.6. Rejected list
- The documents which are rejected by you will be listed in ‘Rejected’ section.
- Select the document you want to reject.
- Click on reject button.
- Reason is mandatory for rejecting document.
1.7. Authorise DDP
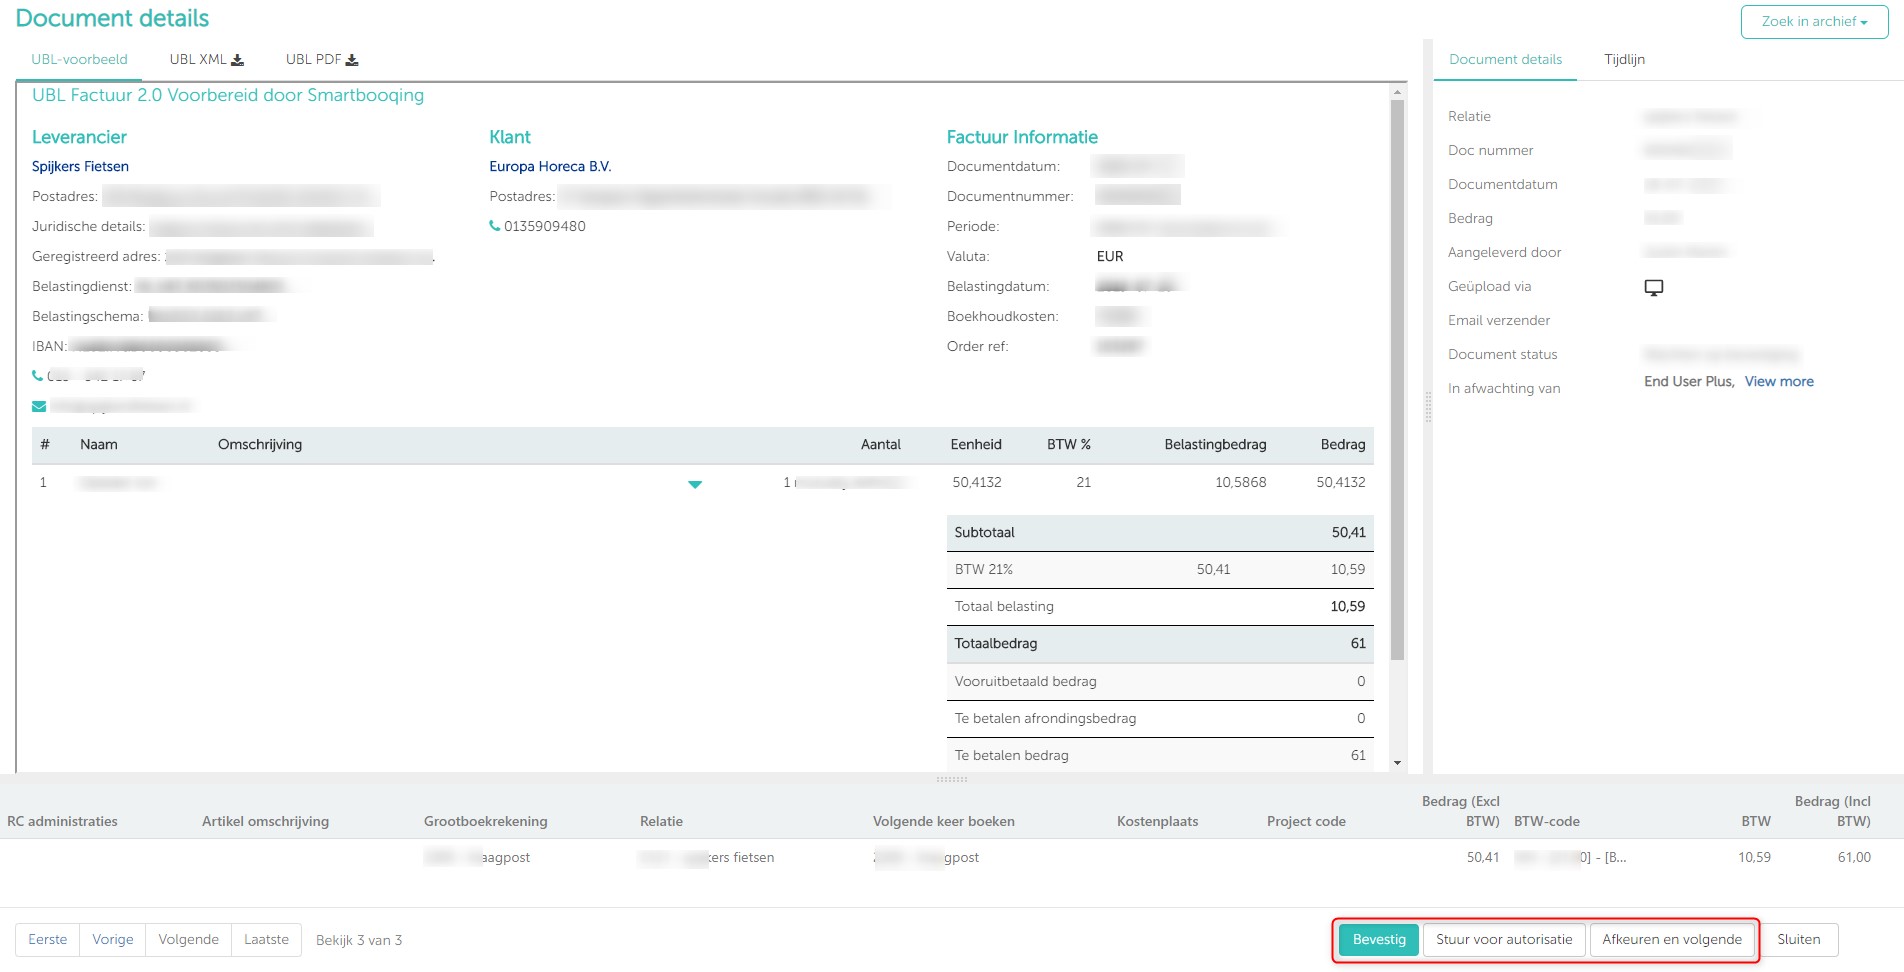
You can even ‘authorise’, ‘reject’ the document from document detail page.

2. Confirmation- concept explanation:
In the following scenarios the invoice come in for confirmation.
If confirmation is enabled. To enable confirmation click here to read more.
- All the completely authorised invoices.
- If a particular document does not meet any of the rules and default authoriser settings is disabled, it will directly come for confirmation.
Actions that can be takes:
2.1 Confirm:
You can select a document and the confirm button activates. You can now click on confirm button to confirm the respective document. Once you confirm the invoice, it will go to Review section.

2.2 Send for Authorisation
Document will be sent back to the Authorisation stage. You can select document and then click on ‘Send for authorisation’. The authorisers name is mandatory to assignee who will authorise the document. If you mention more than one authoriser than all the authorisers need to authorise the document. Only when all authorisers assigned for that rule authorise the document, the document will come for confirmation again.

2.3 Reject
Here you can reject and also see the rejected invoices that were rejected earlier in the authorisation stage.

2.4. Undo
- You can Undo rejected document from Confirmed–>Rejected view
- Select the document you wish to recall
- Click on ‘Undo’ button.
- Document will fall into respective stage from where it was rejected.

2. 5. Confirmed
Here you can see all the confirmed invoices:

2.6 Confirm IDP
- You can even ‘confirm, ‘reject’ the document from document detail page.
3. Icons explained:

- Authorised: Document has been authorised. If icon missing, then document is not authorised and have directly come for confirmation.
- Source file of document: The file type in which the document was uploaded.
- System generated: These icons can be duplicate, new contact and ghost invoice.
- Magnifier– With this icon user will be routed to the IDP (Invoice details page) as shown below
- Comment: If any user has commented on document.
Columns explained (New)
The Authorization page will now show two new columns,
Pending for – This will show the time stamp indicating the time (in hours, days or months) that the document is pending for, with the particular user (authorizer).
Due date – This will be a date which will be internally calculated for the particular invoice or UBL.
- For invoices, the due date calculation would depend on Invoice data and the Payment term selected. If no Payment term is selected on the IDP, the default Payment term of the administration would apply.
- For UBLs, the due date would be picked from the due date tag which is passed.

4. Document detail page- Authorisation:
- When you click on the magnifier you will be directed to the Invoice/Document details page
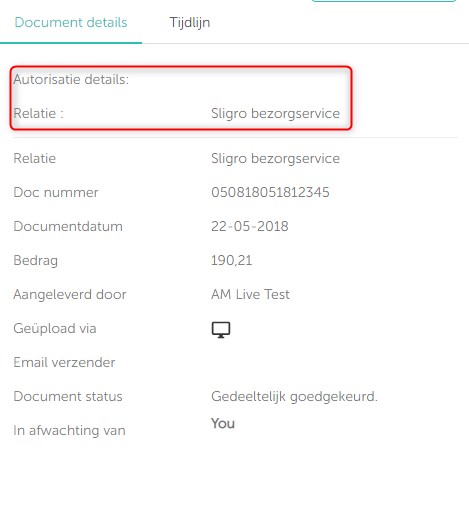
- It shows the detail of the criteria met ( details on the rule). When you click on the magnifier you will be directed to the ‘Document detail page’ On the right hand side, you can find details as shown in the below image.
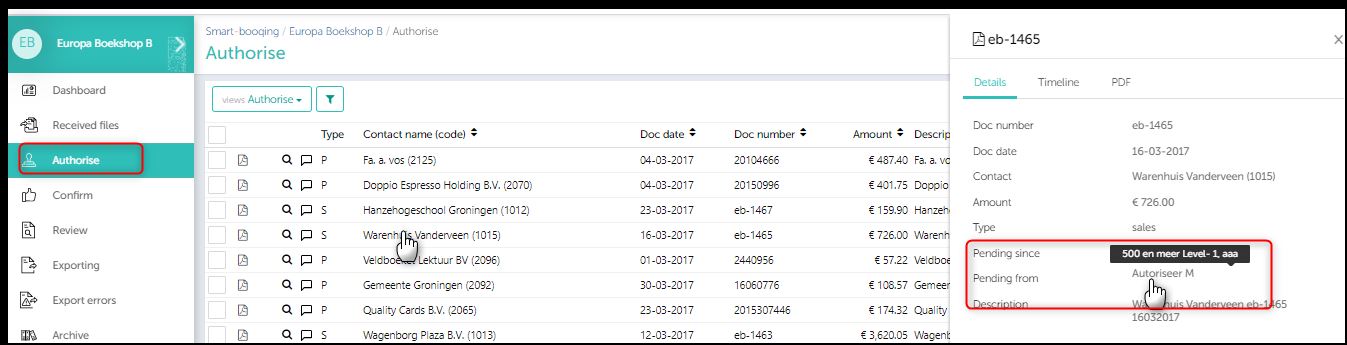
- You can click on then arrow highlighted. You will find details like which authoriser is pending for review and it also shows the rule name. Here the rule name is ‘500 en meer level 1’.