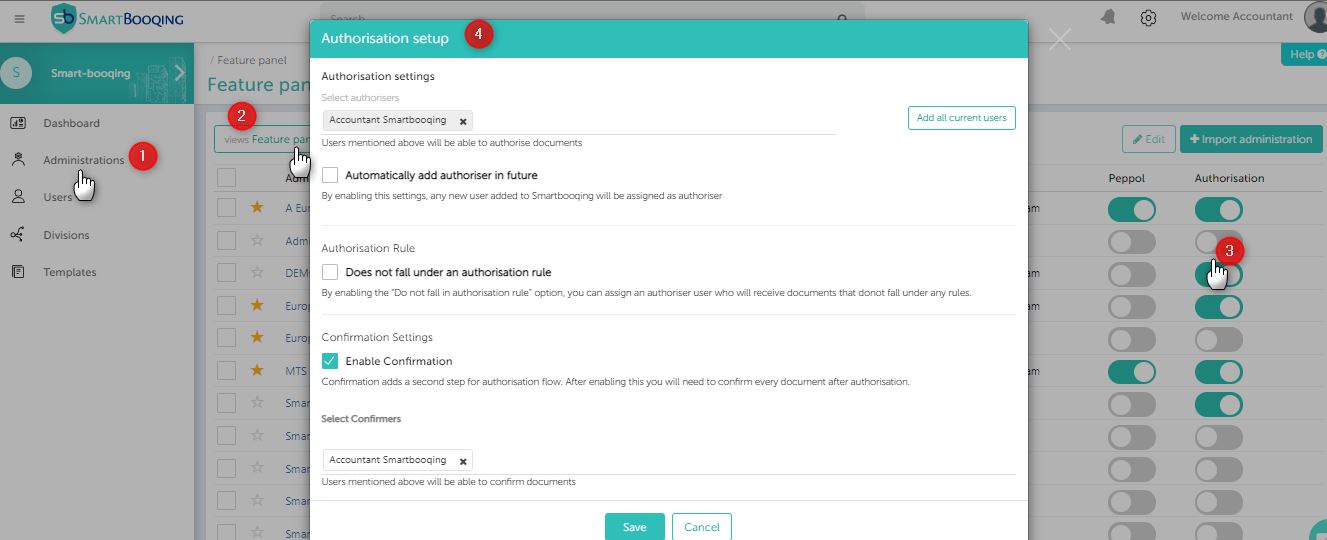
- From feature panel, once you enable authorisation, a window opens where you can set up your authorisation.
- Here you can add default authorisers, enable confirmations, adjust setting to add new users as autthoriser.
There are two approaches to reach this setting:
- First time when you enable authorisation for the administration.
2. Settings page. Select administration -> Setting -> Authorisation-> Authorisation setup.
Details explanation of the setup
1. Automatically add authorisation users in the future:
By enabling this, system will assign the authoriser role to all newly created users for the administration.
2. Not covered by an authorisation rule:
By enabling this, you can set a default authoriser. This default authoriser receives all documents that do not fall under any rule, or when no rule is created, all documents stop for this default authoriser.
Note: If you assign more than 1 authoriser, only when ALL authorisers have authorised the document, the document will move to confirm or review page,
3. Confirmation settings:
• Confirmation can be used as an extra step in the authorization process.
Authorisation -> Confirmation -> Review page
• If you turn off confirmation, the documents skip this step and go directly to the review page after authorisation.
Authorisation-> Review page
Note: Confirmation can also be used WITHOUT authorisation phase.
Steps:
- Enable authorisation from the administration list
- Instead of adding any authoriser or creating any rule, enable confirmation here. Then document will go to:
Confirm -> Review page.
3. You only need to have the role “Confirmer” to be able to confirm all documents. You can add confirmation setting from , Setting-> Authorisation -> user roles -> Select the user and give confirmation rights.
Note: If you have multiple confirmers, documents will be shown to all confirmers. But, unlike authorisation, in confirmation, even if one confirmer confirms the document, the document will be confirmed and will not wait for other confirmers.


