In this article you will find information about:
1. Concept
How to open this page?
Click on the magnifier on the Review page and Document detail page opens.

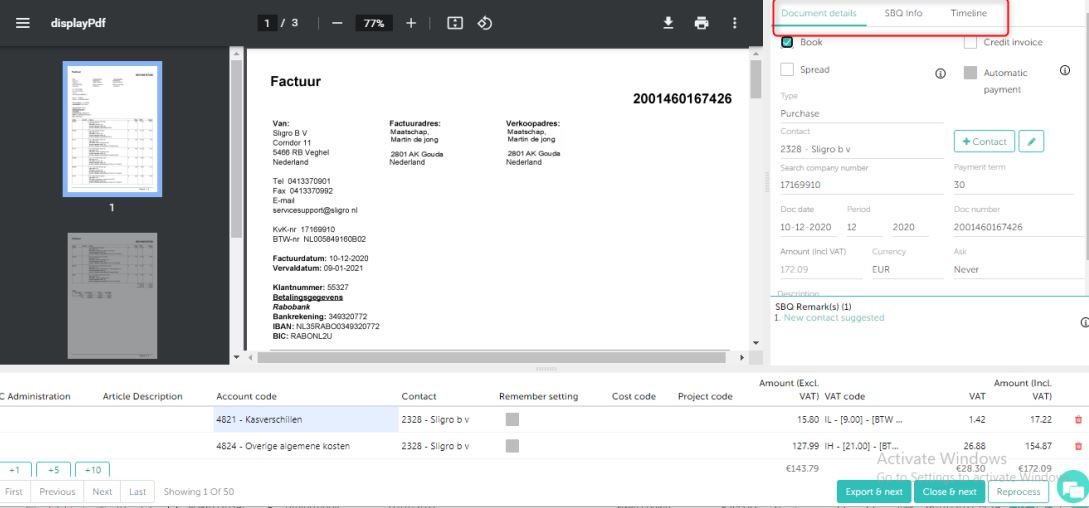
- On this page you can verify the processing of each invoice. You can make changes on it, and export the verified document.
View modes
- To verify it, you can change the view as per your requirement by some options on top of page.

Default view
1.Left – you can see pdf
2.Right – header part of invoice in following sections
- Document details: Will show relation details, invoice details
- SBQ info: Settings information
- Timeline: Action taken with timings.
3. SBQ remarks section: For all the comments/alerts generated by the system are shown.
4. Below – you can see article lines and amounts
- Quantity and Location:
- Available only for agro administrations. (Agro companies are identified based on sector of the company)
- Can be selected only on the lines
- Applicable only for Visma and AccountView.
- Values in these fields to be filled manually and these will be exported to your accounting system.
Location:
- Available for any VISMA administration
- Can be selected for full invoice or lines
Edit mode:
Edit headers of invoices
- Edit header details – You can change relation, edit document number, date etc
- Edit relation – Click on the edit icon- You can edit relation basic details.You can maximize it when you click on the image highlighted in the image.

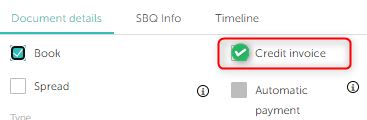
- Convert to credit / non –credit
- Edit article line – Just click on the line to edit account code, amounts etc.
- Cancel changes – Cancel the editing on article line , this you can do while edit line only
- Delete whole line – Deletes whole line, user cant get it back after delete, if want then need to add new line
- Adding new lines – You can add 1, 5, 10 lines. Highlighted in turquoise green color (left-below)

2. Understanding the color codes
Book Next time (Remember setting): Tick it when you want to remember setting for future invoices. Here the account code becomes dark blue. Untick RS checkbox, when you want setting only for this invoice. Here account code colour is light blue.

Click here to read more about Book next time setting.
3. Other options available:
- At the extreme corner you will see the below options available:
- Back: You will go back to review page, This button displays when page is opened in same window.
- Export and next: The invoice will get exported and the next invoice will be made available on the DDP.
- Close and next: The invoice will available in closed comments sections on Review Page and the next invoice will be made available on the DDP.
- Navigation: First, previous, next, last
- Reprocess: Send the document for processing again.
![]()
Note – Changes made on DDP will get saved and exported, but not reflects on next processing. Except column “Book next time”.