In this article you will find information about:
1. Cost code concept-when to use?
When cost center wise break of expenses and incomes is desired by the organization, cost centers are created in their accounting system.
2. How cost coding works?
Cost codes needs to set in Accounting system, which are then fetched in Smartbooqing via admin sync. Then in SBQ, cost centers needs to be either assigned to a relation/ account code/ relation and account code/ specific profile/ article groups/ manually for an invoice from DDP.
Settings
- Sync the administration in Smartbooqing, to receive the cost codes.
- Once admin is synced successfully, you will receive the cost codes.
Step 01:
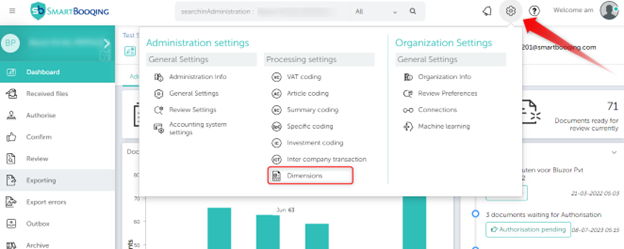
- Select administration.
- Go to setting.
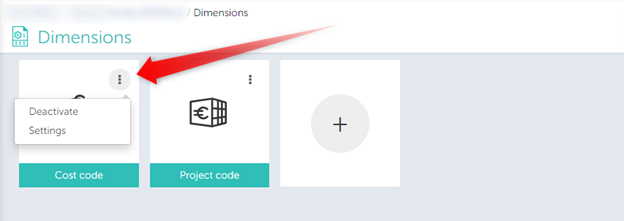
- Click on dimension menu; you will see several dimension tiles on the right.
- Click on Cost Code.

- You can view the cost codes imported from your accounting system by clicking the “cost code” tile. On the page that appears, click on ‘View cost code’ (top right)

Step 02:
- On the dimensions “cost code” page you will see the table with all columns.
- Press the “+ New” button on the right to create a new line.
- Once rules have been created you can see rules in this table.
- You can also update the rules by double-clicking the rule.
Step 03:
- Once you click “+ New”, the popup will open.
- On the left you will see “relationship name”, “keyword in”, “keywords” and “ledger code” from which to select. (Important: Press Shift + Enter to successfully save the keyword.)
- On the right-hand side under ‘then’ you can assign the partner code.
- You can turn “Review comments” ON or OFF. If it is ON, invoices booked with dimension “partner code” will always appear as a comment on the review page.
- At “Project code line dimension” you will see the selection / criteria you have selected.
- Clicking “Create” will create the rule with the selected criteria.


- The section will have the following items:
- Cost codes
- Total dimension codes
- Active dimension codes
- Status
- Active: Activated cost codes will be available for mapping.
- Deactivate: Deactivated cost codes will not be displayed for mapping.