In this article you will find information about:
- Locations – when to use?
- How the location works?
- Settings
1. Locations: when to use?
The purpose of “Location” is to distribute certain costs among one or more locations of a company and to allocate general ledger accounts to them.
2. How does “location” work?
- Location are imported / synchronized from your accounting software in Smartbooqing.
- You can make the settings for using these codes as described below.
- Once the settings are complete, invoices will automatically be assigned locations when processed.
- These locations are sent to the accounting system when the invoices are exported.
- You can sync the location in two ways:
- a) From location page dimensions
- b) From the review page
3. Settings and settings
You can set rules and assign location using a simple and flexible approach in popup as follows:
Step 01:
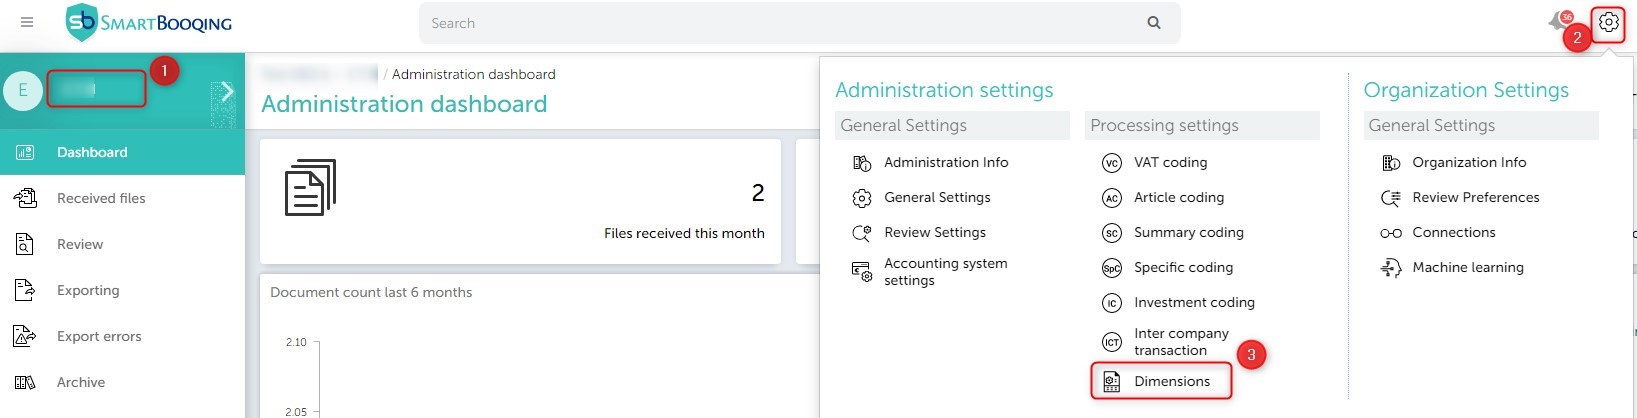
- Select administration
- Go to settings
- Click on Dimension Menu; you will see several dimension tiles on the right
- Click on Location

5. If the location is not active, you can activate / deactivate it by clicking the three dots in the top right corner and clicking activate.
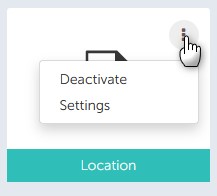
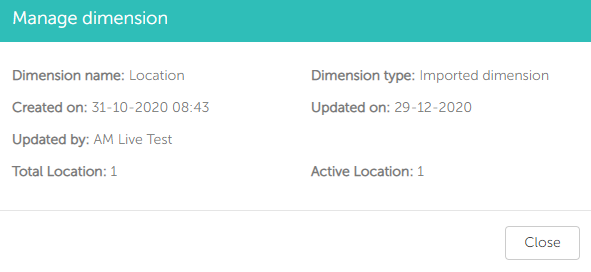
6. In the same way, you can click to view the settings.
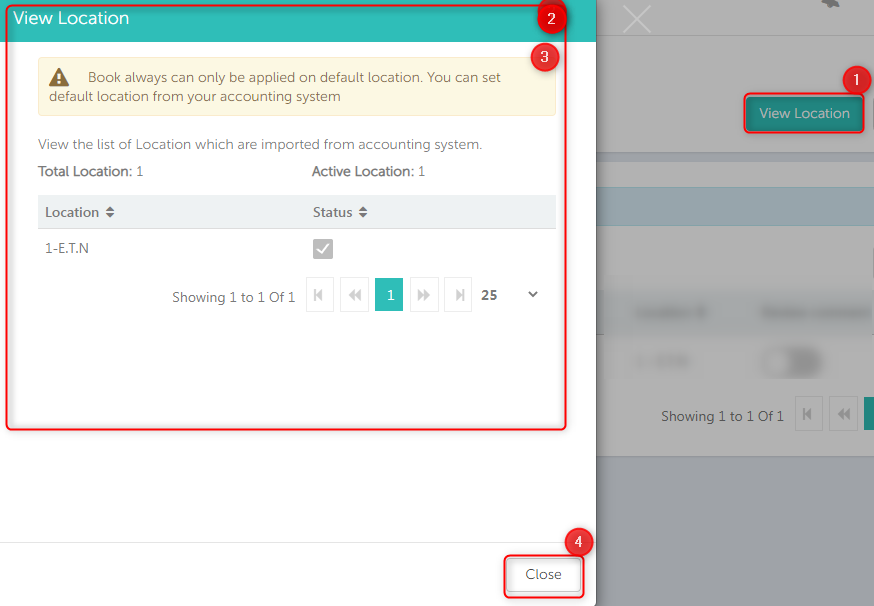
7. You can view the location imported from your accounting system by clicking the “location” tile. On the page that appears, click on ‘View locations’ (top right) Set default location from your accounting system. “Always book” can only be applied to the default location
Step 02:
1. On the dimensions “locations” page you will see the table with all columns.
2. Press the “+ New” button on the right to create a new line.

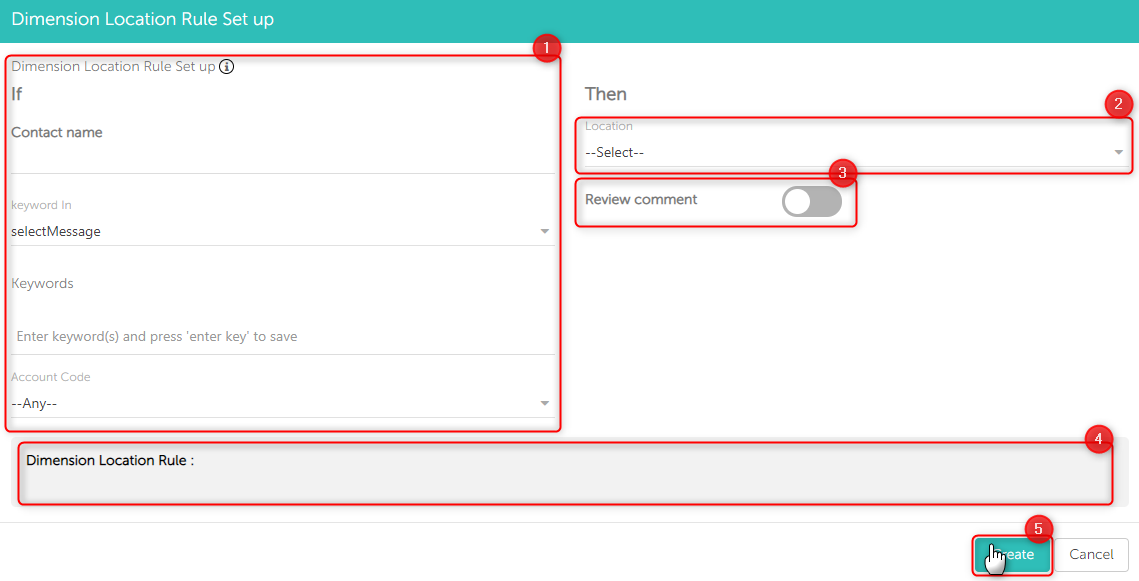
Step 03: Once you click “+ New”, the popup will open.
- On the left you will see “relationship name”, “keyword in”, “keywords” and “ledger code” from which to select.
- You can assign the location on the right-hand side under ‘then’.
- You can turn “Review comments” ON or OFF. When ON, invoices posted with “locations” dimension will always appear as a comment on the review page.
- At “Dimension Locations rule” you will see the selection / criteria you have selected.
- Clicking “Create” will create the rule with the selected criteria.
Step 4: Info Icon (i). As soon as you click on the info icon at the top, an information box will appear with:
- How do I create a new rule?
- How does priority work?
- Once a rule has been created, you can see it under the dimension’s table.
- You can edit the rule by double clicking on the rule.
Brief information:
- How do you create a rule?
- In the flexible dimension approach we have certain conditions for creating a rule.
- The user must select at least one option in the “IF” condition (left side in Pop-up) and then assign a location, after which a rule can be created.
- If the user does not select an option and tries to assign a location, an error will be displayed “To create the rule, the user must select at least one as Condition with code assignment”
- Selection fields work according to the table below:
B. How does the default priority work?
In the event that a particular relationship is assigned to more than one line, the processing takes place according to the following priority order
- Priority 01: Line keyword
- Priority 02: Specific / Item
- Priority 03: General Ledger Code
- Priority 04: Keyword header
- Priority 05: Relationship
- Priority 06: Other addresses

Step 05: Review comments
1. A comment is displayed on the review page if it is enabled.
2. The comment is shown if “Dimension location has been applied”

Step 06: DDP screen
1. You can also see the active dimension with the selected code. Double click below the location.
