In this article you will find information about our Dimension feature and how rules are being created for supported dimensions by your accounting system.
- Introduction and General Information
- Getting started – How to start using Dimension?
- How to set rules in Dimension?
Introduction and General Information
Dimensions provide more flexibility to users for setting up rules via dimension fields and can be set up very easily. Currently we are supporting 2 types of Dimensions:
1. Import dimension from Accounting system
Brief Details: These dimensions are predefined and we import these from accounting systems for example Cost Code, Project code, Partner code, Location.
2. Free Dimension
Brief Details: These dimensions are predefined and its values are entered in the Smartbooqing portal, For example Unit, Quantity, Weight, Agro Quantity & Agro weight.
Please check the overview of accounting systems for which we support different types of Dimension.
| Dimension | Dimension Type | Import | Export | AFAS | E-Accounting | ExactOnline | Twinfield | VISMA | SnelStart | Account view | API |
| Cost Code | Import Dimension | Y | Y | Y | Y | Y | Y | Y | Y | Y | import & Export |
| Project Code | Import Dimension | Y | Y | Y | Y | Y | Y | Y | Y | Y | import & Export |
| Partner Code | Import Dimension | Y | Y | N | N | N | N | N | N | Y | import & Export |
| Location | Import Dimension | Y | Y | N | N | N | N | Y | N | N | import & Export |
| Agro Quantity | Free Dimension | Y | Y | N | Y | N | N | N | N | Y | import & Export |
| Agro Weight | Free Dimension | Y | Y | N | Y | N | N | N | N | Y | import & Export |
| Quantity | Free Dimension | Y | Y | N | N | N | N | Y | N | N | import & Export |
| Unit | Free Dimension | Y | Y | N | N | N | N | Y | N | N | import & Export |
Y: Yes | N: No
Getting Started: How to Start using Dimension?
While importing administration from the accounting system, We will import all supported dimensions from the accounting system and it will be available under Administration settings-> Dimension menu.
Deactivate Dimension: You can Deactivate it as well if you do not want to use any dimension.
Steps for deactivating Dimension:
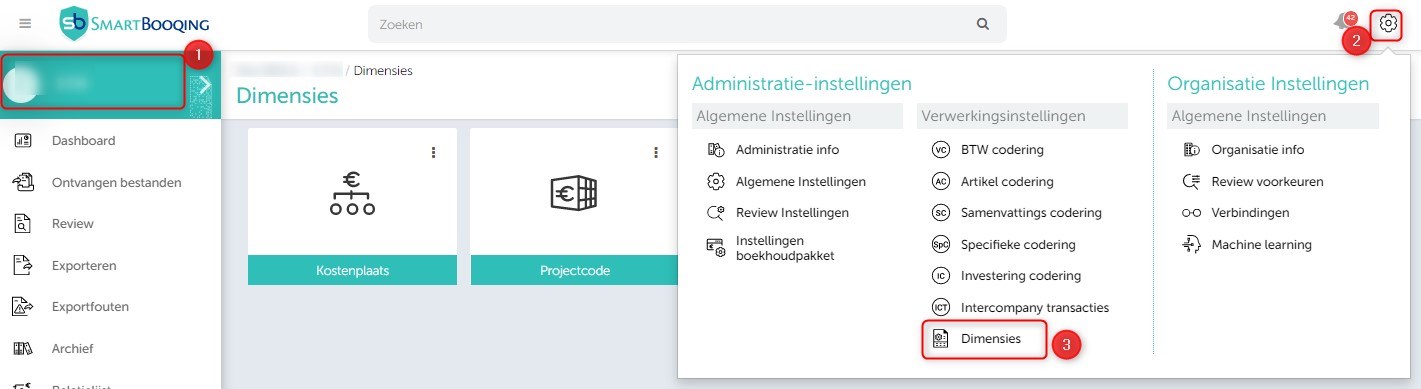
- Go to administration
- Go to settings and then Click on Dimension
- See all dimension on right hand side
- Click 3 dots on top right hand side of tile
- Select option to Deactivate
- Dimension will be Grayed out and it will become inactive
Activate Dimension: You can activate dimension at any moment so that you can use it for rule creation .
- Go to administration
- Go to settings and then Click on Dimension
- See all dimension on right hand side
- Click 3 dots on top right hand side of tile
- Select option to Activate
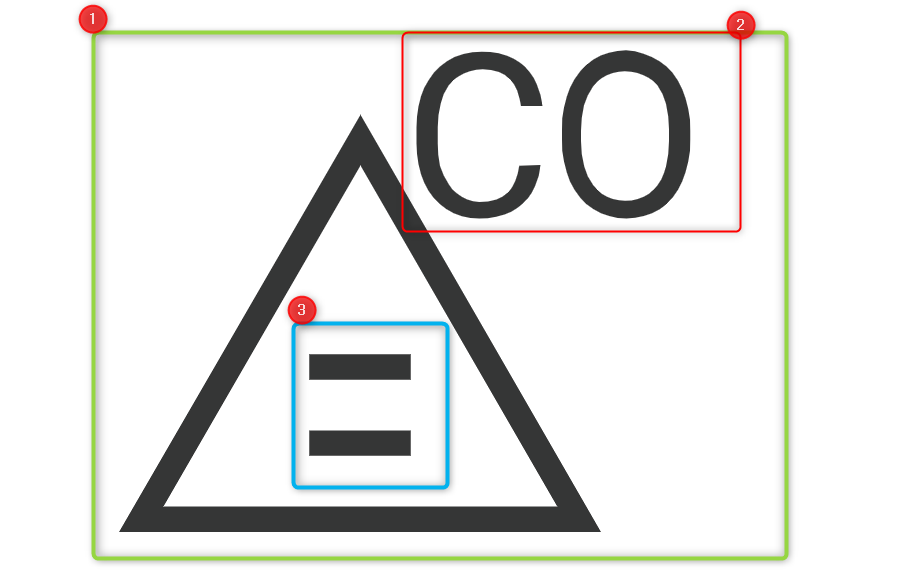
Icons on Review Page:
If Administration is activated for Dimension, then you can see icons on the review page and there are different kinds of Icons available on review for which you can find details below.
| ICON Details
|
| 1.Traingle > It will be fixed and it will appear in each icon
2 CO > “CO” signifies that what type of Dimension (For each Dimension we will have show 2 characters ) E.g Cost Code > CO ( On icons above triangle ) values are the same and this will change according to Dimension value . Note : It will be shown on Review page under Extra Column settings |
| Description | Header dimension | Line dimension | Icon displayed | |
| 1 | – Header and Line values are same | A | A | 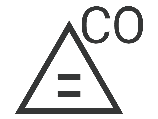 |
| 2 | – Header and Line values are different.
– Also header and line values are not empty. |
A | B | 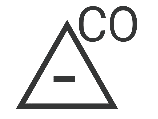 |
| 3 | – Header has value and line has some empty values | A | empty |  |
| 4 | – Header value is empty and line has value. | empty | A |  |
| 5 | – Header and line both are empty. | empty | empty |  |
Imported Dimension:
These dimensions are predefined in the accounting system and imported directly for administration with an active dimension. Currently we support Cost code , Project code , Partner code , Order code and Location under Imported dimension .
How to set rules in Dimension?
COST CODE:
You can set rules and assign cost code with help of a simple and flexible approach in pop up so kindly refer below process
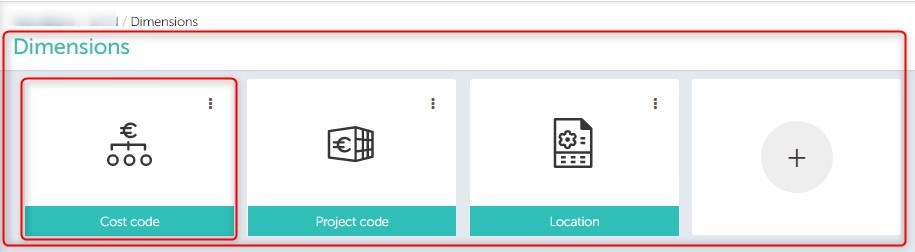
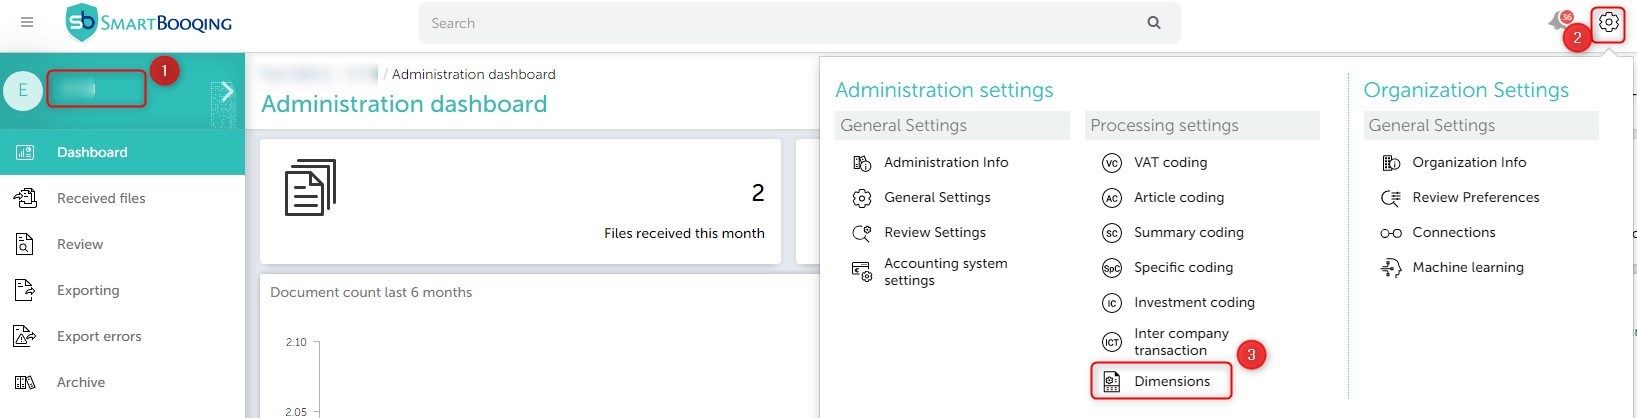
Step 01:
- Select Administration
- Go to settings
- Click on Dimension Menu
- See all dimension tiles on right hand side
Step 02:
- Click on Cost Code tile
Step 03:
- You will see grid table with all columns
- New button on right hand side for creating a rule
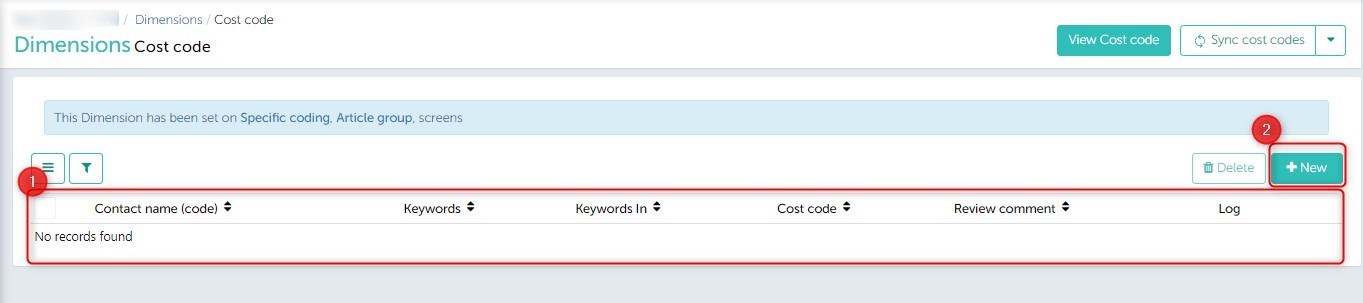
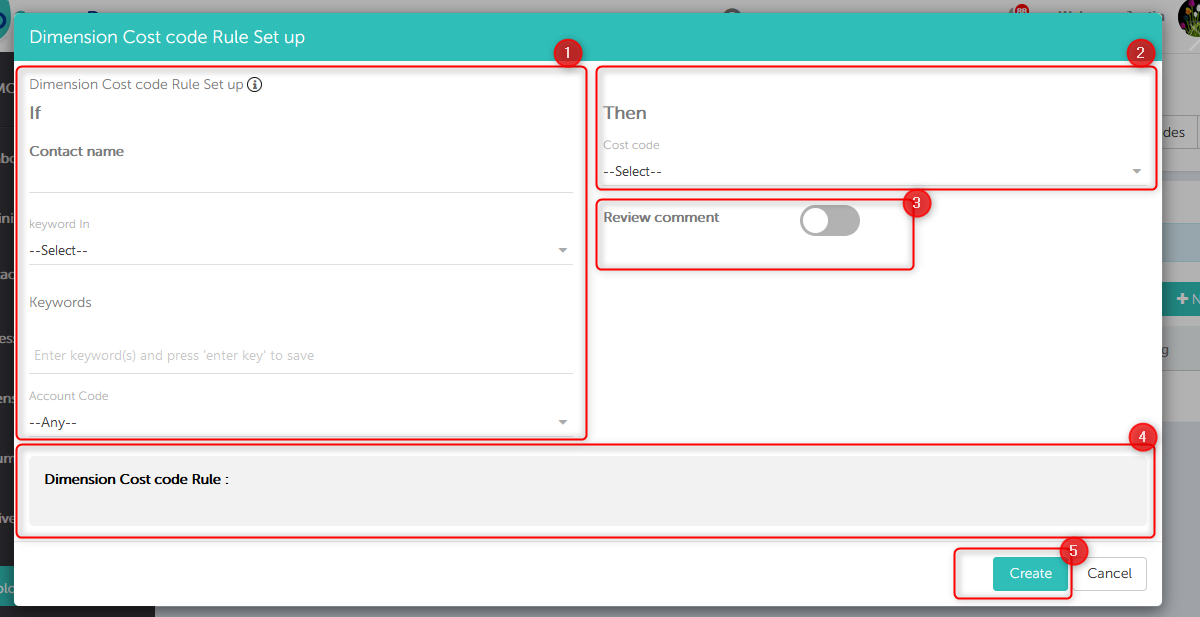
Step 04: Once you click New Button, Pop up will open
- Pop up on left hand side will have Contact name, Keyword in, Keywords & Account code to select
- Right hand side under ‘then’ section you will cost code assign part
- Review comments toggle, if you enable it then you will be able to see comments on review page for dimensions
- Below you will be able to see Dimension cost code rule as per your selection in “IF “& “Then” format.
- Once you select create button then rule being created for selected combinations
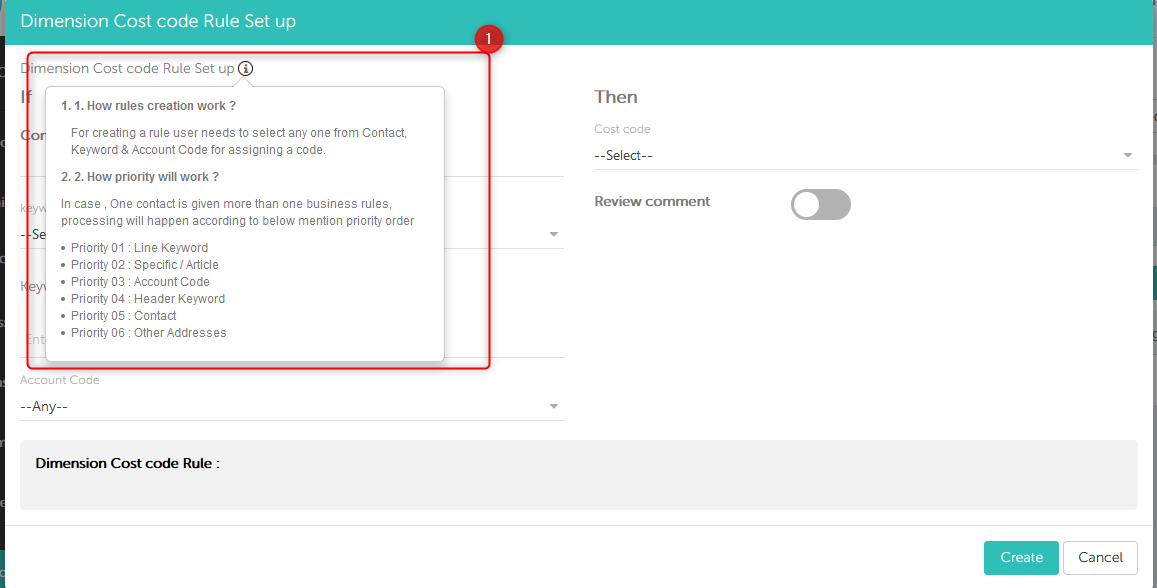
Step 5: Info Icon ( i ) – Once you click info icon on top then you will get brief information in a box
- How rule creation will work?
- How will priority work?
Brief Information:
- How will Rule creation work?
- In Flexible Dimension approach we have certain condition for creation a rule
- User needs to select a minimum one option from “IF“ ( Left hand side in Pop up ) condition and then assign a Cost code then rule can be created .
- If user does not select any option and try to assign cost code then it will show you an error “Creation of rule require user to select minimum one if Condition with code assignment”
- Selection fields works as per below table,
| Rule creation Fields | Allow users for creating a rule | Remark |
| Contact | Single / Multiple Contacts are allowed to select for creating a rule | |
| Keywords | Multi text – User can enter multiple keywords for creating a rule | Press Shift+Enter to register. |
| Account code | Single – User can select account code and create a rule | User can create a rule with “ANY “ account code option with one more attribute selection from Contact or Keywords |
| Cost code | User need to select cost code for creating a rule after selection of one attribute from IF condition |
B. How will default priority work?
In case, One contact is given more than one business rules, processing will happen according to below mention priority order
- Priority 01 : Line Keyword
- Priority 02 : Specific / Article
- Priority 03 : Account Code
- Priority 04 : Header Keyword
- Priority 05 : Contact
- Priority 06 : Other Addresses
Step 06 : Grid table / Dimension rule table
- Once rules are created , You will be able to see rules in this table and this grid table. You can also update rules.

Step 07 : IDP Screen
- You can also see active dimension on IDP screen along with its selected code

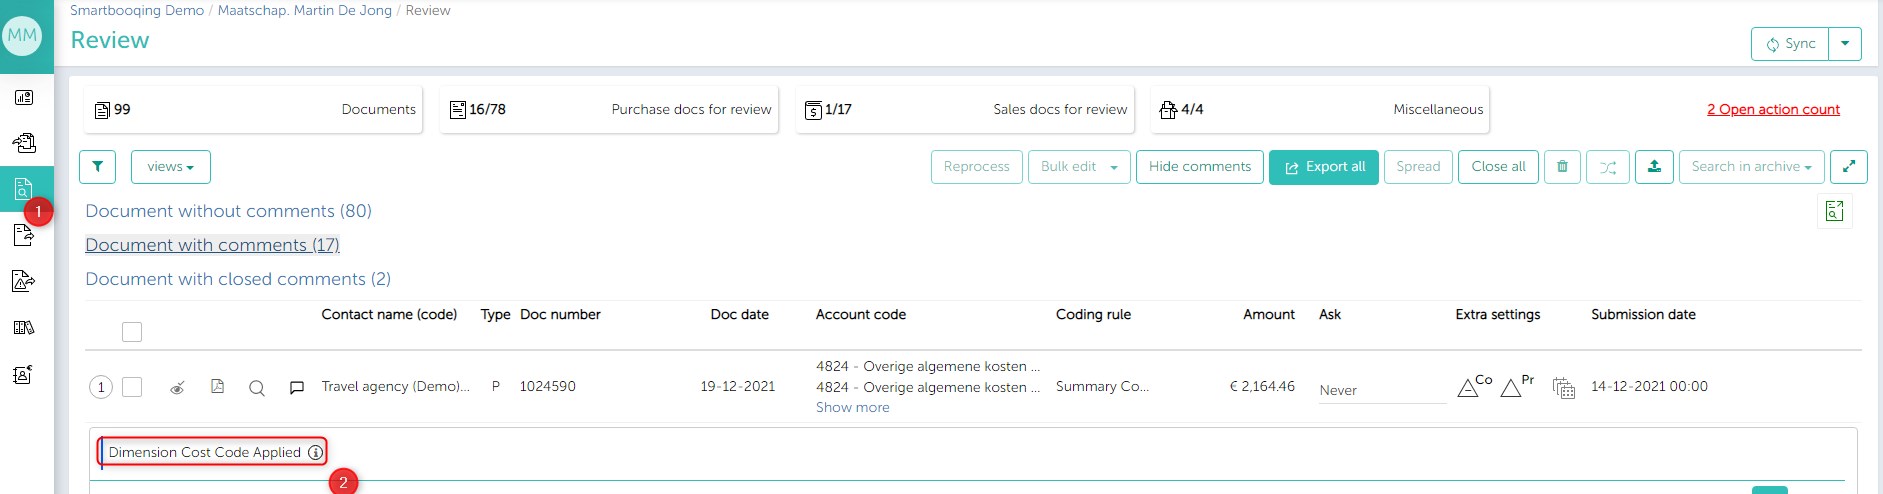
Step 08 : BR Comments
- On review Screen BR comment is shown when user enable review comment in a pop up or in Grid table
- BR comment “Dimension cost code is applied”
Step 09 : Article and Specific – Set Cost Code dimension
As per current functionality users are able to set cost under Article coding and Specific coding and with this release, There is no change and user will still be able to set cost code on this screen.
Important information: Like cost code , You can create rules for Project code , Partner code Order code & Location with help of above approach it will have similar functionality in approach.
Default Location:
Additional to rule creation approach in Dimension for location, We have feature for VISMA Administration to book on default location, which you can see now as well ,
Go to Administration > Settings> General Settings > Under Advanced settings > Option Book on default location is available ( There is no change in this approach with this release of Dimension and user will still be able to book on default Location )

Order Code :
We also allow users to create rules for Order code as well through API. Users are able to set Dimension rules with help of the above rule creation approach and it will work like any other imported dimension (E.g. Cost Code , Project Code , Partner Code ,Location).
Free Dimension:
Free Dimensions are predefined and values are entered in SBQ and currently we support Free dimensions, Unit, Quantity, Weight, Agro Quantity, Agro Weight for Account View and Visma administration only .
Unit :
As these are free dimensions, Unit Dimension will be available Under dimension Menu with a tile and value can be entered in SBQ.
Step 01 :
- Go to Administration
- Go to settings
- Click on Dimension Menu
- See Dimensions on right hand side
Step 02 :
- Once user select Unit Dimension then they will see a Pop up.
- Pop up will have information that “Free Dimension values you can enters in document detail page”.

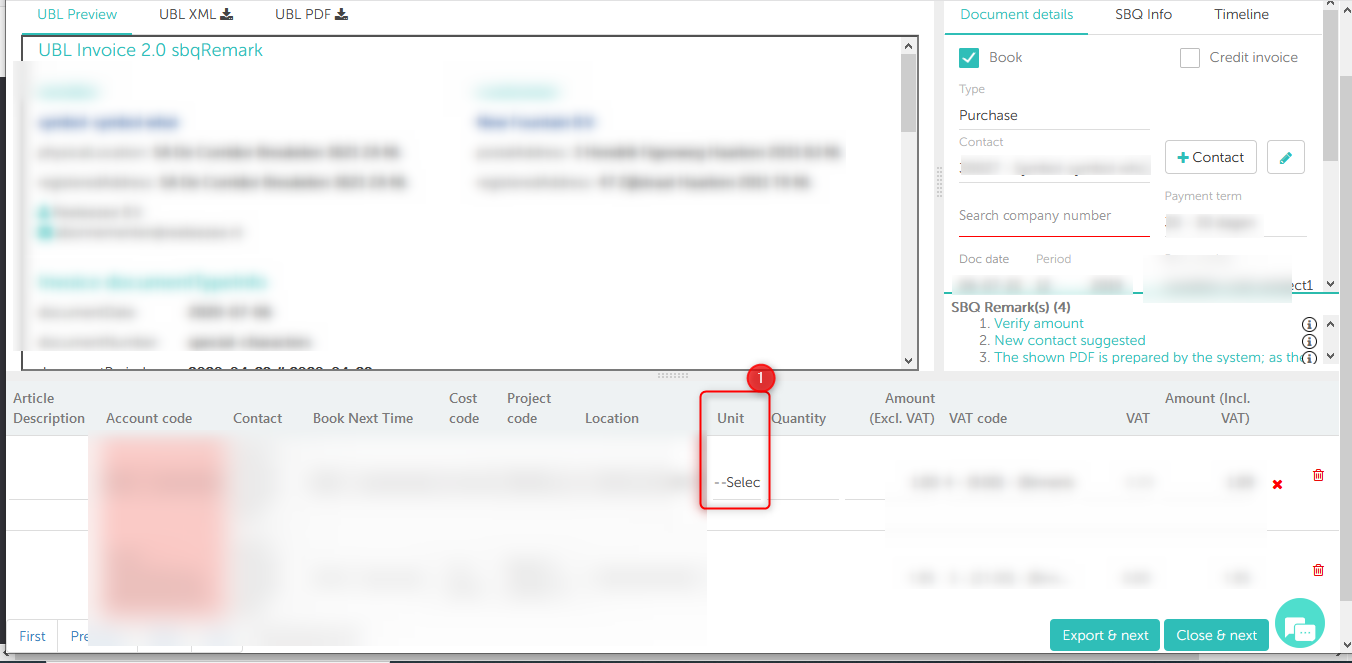
Step 03 : Go to Document Details page / IDP Screen
- Unit Dimension will be present on IDP and values which are entered will be exported in the accounting system .
Quantity :
This is free dimension for which tiles are shown for administration under dimension menu.
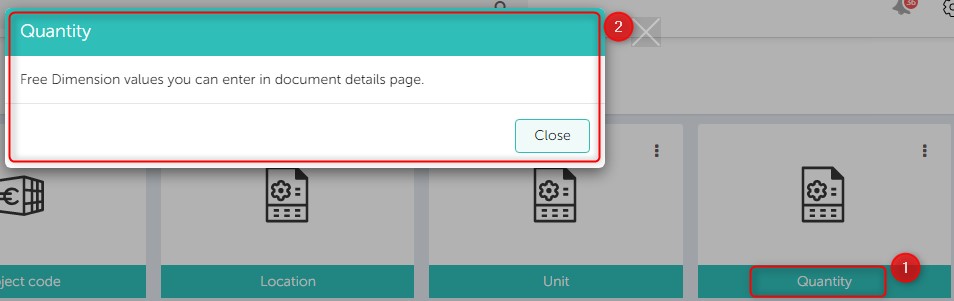
Step 01 :
- When you select Dimension Quantity , Pop up will appear
- Pop up will have information that “Free Dimension values you can enters in document detail page”.
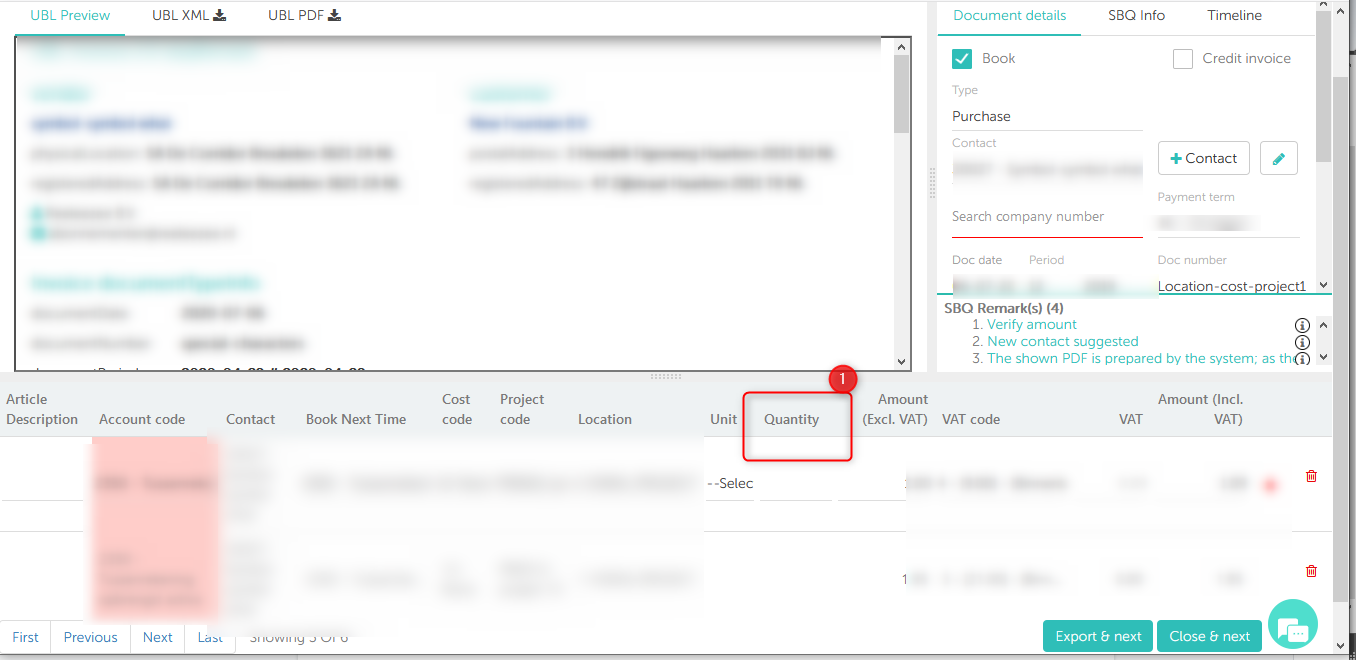
Step 02 : IDP / Document details page
- As this free dimension , User can enter values in SBQ and their values are exported to the accounting system.
Important Information: Similarly Agro Quantity and Agro Weight Dimension will be supported in SBQ.