In this article you will find, how to apply ‘No split pdf’ settings while uploading documents from portal and sending documents from email. With this, you can instruct the system to avoid splitting of pages for the submitted documents.
‘No split pdf’ settings allows you to stop splitting of pages for the submitted documents.
‘No split pdf’ setting can applied to documents by following options:
- Uploading files from website
- Send files from Email
1. Uploading files from website
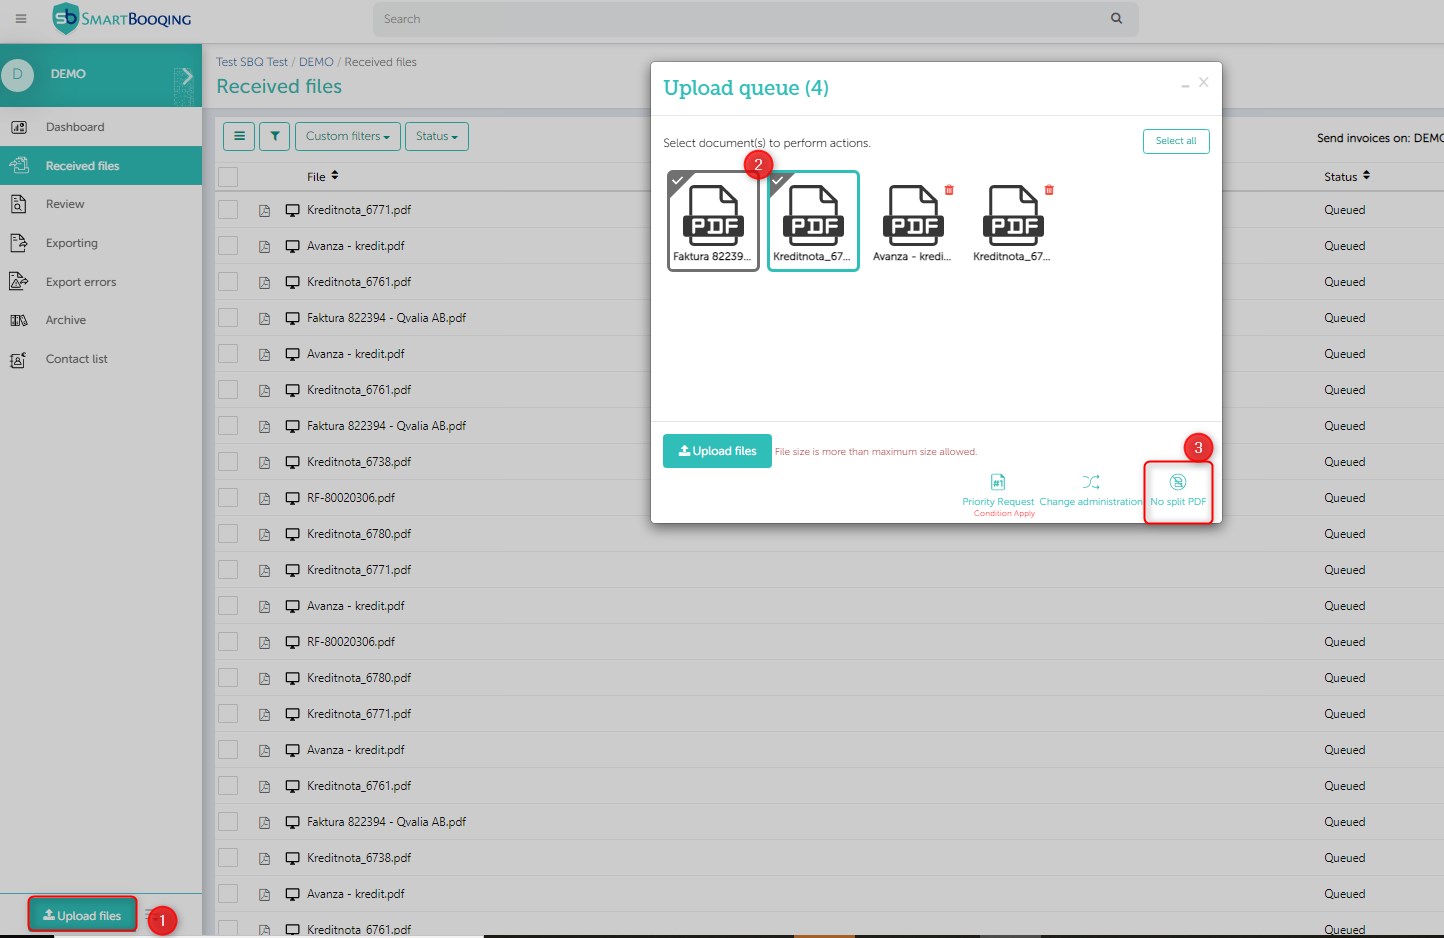
Apply No split pdf setting: Apply ‘No split pdf’ setting to documents once they are in upload queue, follow the below steps to apply no split pdf settings.
- Upload documents
- Select documents on which you wish to apply ‘no split pdf’ settings
- Now click on ‘No split pdf’ button.
- No split pdf icon is displayed, if settings is been applied successfully.
- You will also be notified that on how many document ‘no split pdf’ settings is been successfully applied.
Note:
- Be quick in applying ‘No split pdf’ as they cannot be applied on document(s) once they are picked for processing.
- Also you cannot select a document, when the respective document upload status is in progress.
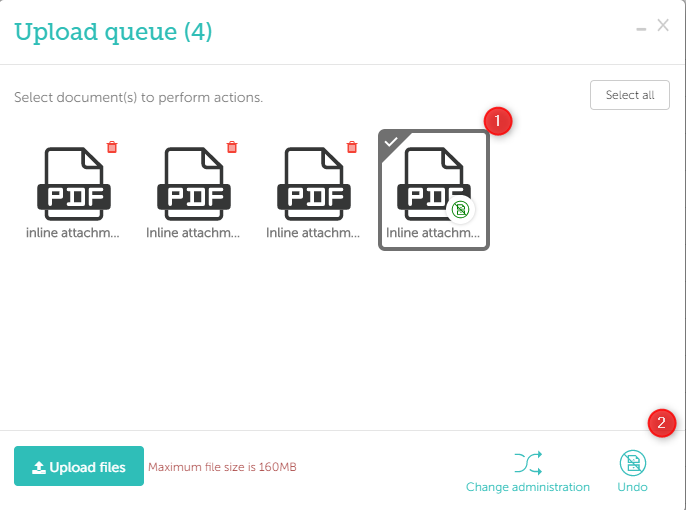
How to Undo the applied ‘no split pdf’ settings
- Select document(s) on which ‘no split settings’ is applied.
- If you only select such document(s) on which ‘no split pdf settings ‘is applied, then only the ‘No split pdf’ button is changed to ‘Undo’ button.
- Now click on Undo button, to undone ‘no split pdf’ setting on selected document(s).
- No split pdf icon will disappear after successful Undo.
Note:
- If you select document(s) on which No split pdf settings are applied as well other documents on which no split pdf settings is not applied then, Undo button will not appear.
2. Send files from Email Upload settings:
You can even apply these settings to documents which are sent from email.
Where to adjust the setting ?
Steps:
- Select the administration. Go to Administration settings
- Select Basic, click on Show advance settings
- Right hand side you will find section ‘No split PDF documents settings
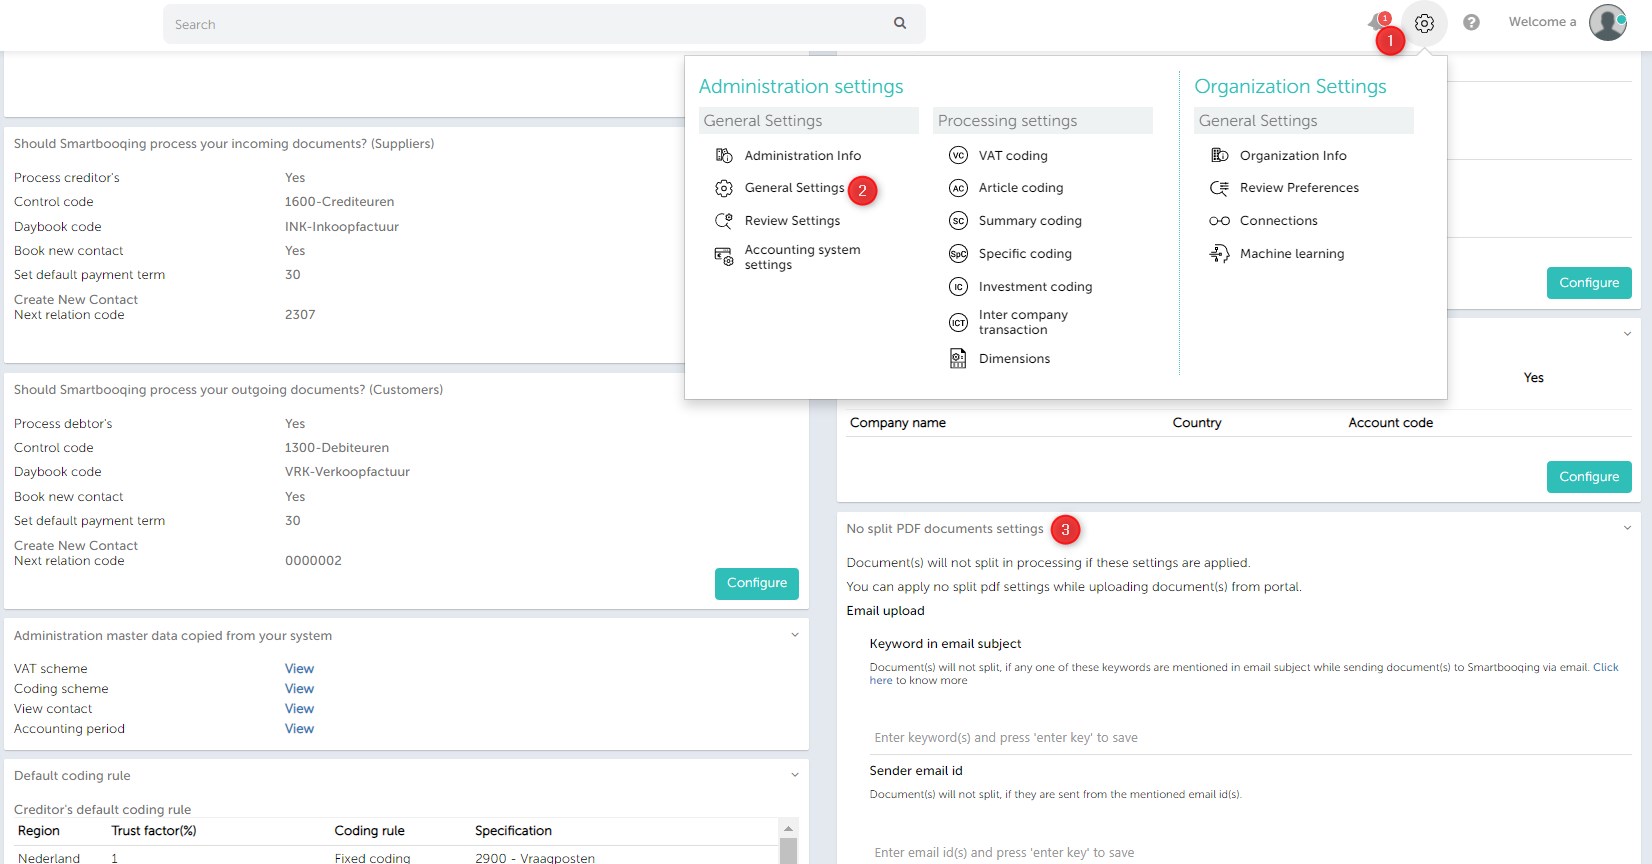
Manage your ‘keyword in email subject’ and ‘sender email id’ for no split pdf here.
- Keyword(s) in email subject
- Sender email id(s)

Keyword in email subject
You can define keywords or a sentences for ‘no split pdf’. This setting will be applied if these keywords are a part of email subject while sending documents.
- Type your keywords/ sentence and hit enter key to save.
- To remove email address, click on cross symbol.
- Anyone of the defined keywords sentence should be mentioned as a part of email subject.
- Example: no split factuur 266235
- Where, no split: is the keyword set in the settingfactuur 266235: this is the subject line of the email
- Anyone of the defined keywords sentence should be mentioned as a part of email subject.
Sender email id
You can define email ids for no split pdf settings. This settings will be applied on documents received from the mentioned email id(s).
- Type your sender’s email id and hit enter to save.
- To remove keyword click on cross symbol.
- ‘No split settings’ will be applied on all the attached document received from the mentioned email id(s).
Review Page:
Now identify document on which you have applied ‘no split pdf’ settings:
- Document(s) which are ‘Split’ by Smartbooqing.
- Document(s), on which ‘No split PDF’ settings is applied.

Note: ‘No split PDF’ setting, is only applied to an individual scan/file. If you send multiple files and apply ‘No split PDF’ settings, then they won’t be merged into a single document.