In this article you will find information about:
- How can I go to the ‘Division’ section?
- Adding a new division
- Adding an administration to the division
- Unassigning the administration from division
- Editing division name
- Filters available
1. How can I go to the ‘Division’ section?
Division: It can be different location / team / department/ SMEs/ agro/ franchise
Users can belong to multiple locations / divisions. Administrations can belong to one division. It is used to better organize your organization.
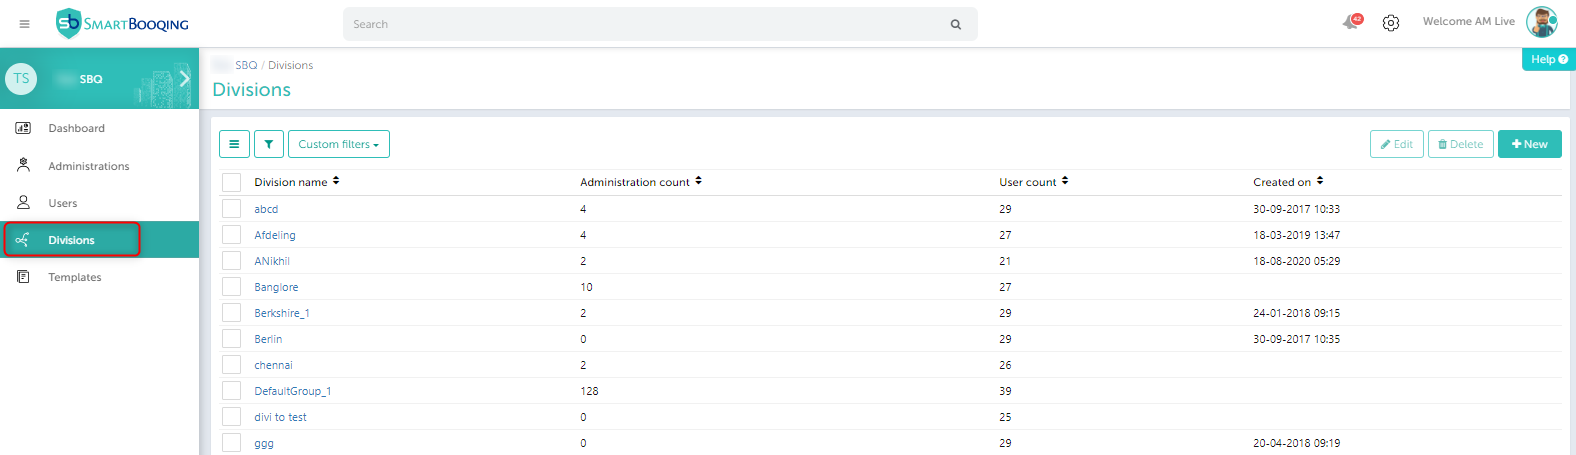
Division is a collection of administrations, users. You can find the option ‘Division’ on the left hand side option panel. A default view will provide you the view with columns as ‘Division name’, ‘Administration count’, as shown below-

2. Adding a new division:
To add a new division, you can click on the ‘+New’ button and enter the division name. The newly added division will be visible in the division list with details like created on, no. of users and no. administration in that particular division.
3. Adding an administration to the division:
While adding a new administration to any division, you can simply click the checkbox and go to the ‘Edit’ mode for that division. From the administration tab, you can search the administration and select them to assign to the current division, as shown in the below screen.


4. Unassigning the administration from division:
Once you are in the Administration tab you can click the check boxes and click ‘Un-assign’ button as shown below.
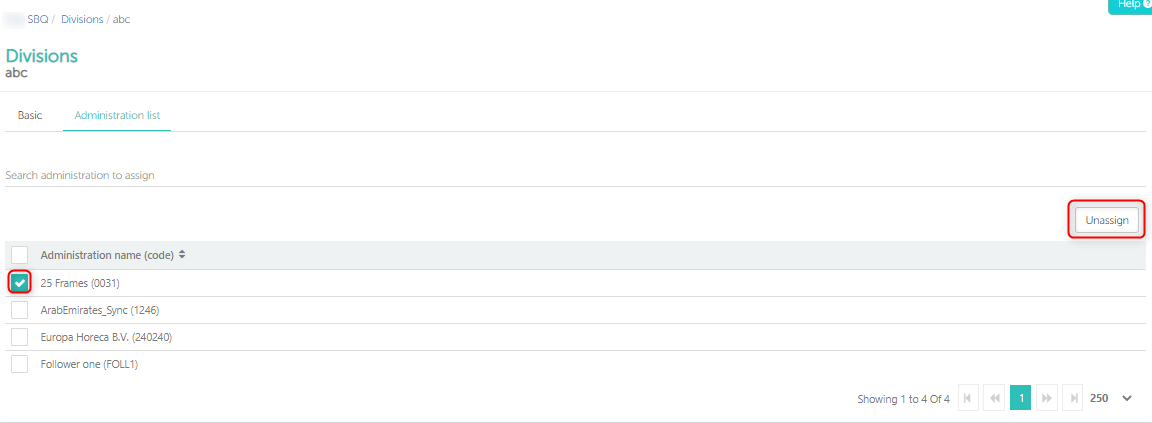
So with this action those administrations will be unassigned from that division.
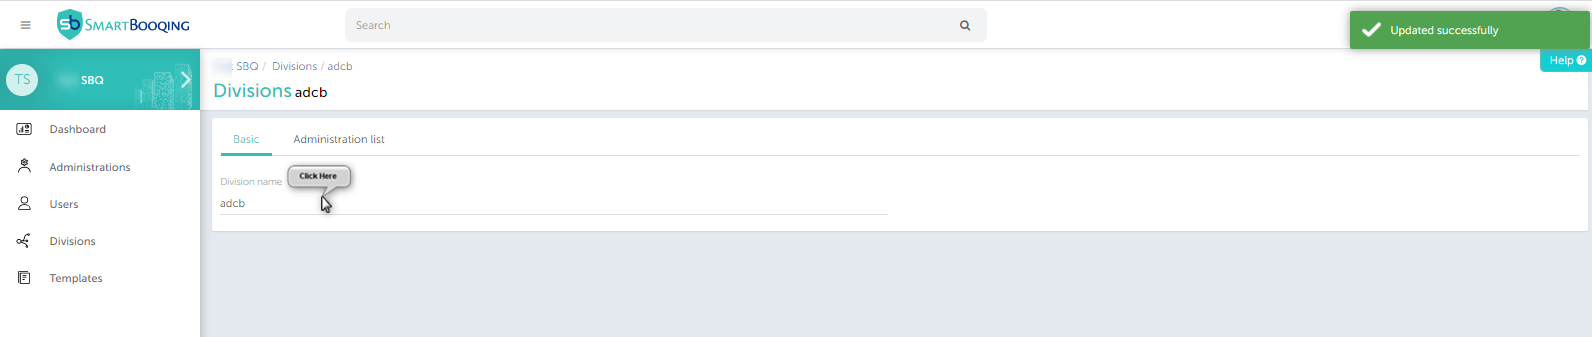
5. Editing division name
To edit the division name, select standaard (basic) and edit the division name. You will be notified that it has been successfully saved.
6. Filters available
You can hide and show columns by clicking on the tick mark besides the column name (highlighted in the image)

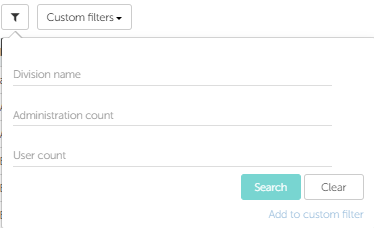
Custom filters:
You can save a filter and you can use the saved filter again.
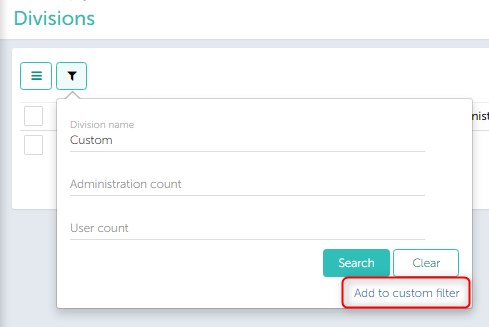
Enter details in the below filter available then click on ‘Custom Filter’. Enter the name you want for the filter > click on ‘Create Filter’. The filter will get created. Select the filtered you created and you will be directed to the filtered list.
