In this article you will find information about:
1. Prerequisites:
What you need to have?
- Configure token for each AFAS organization. In case if you have multiple AFAS organizations then you need to add TOKEN for each organization using ‘Get connectors’.
- AFAS user entered must have permission to access ‘Get connectors’, ‘Update connectors’ and ‘Data Connectors’ while configuration of token.
What will be provided by Smartbooqing?
Get connectors provided by Smartbooqing
Any additional settings/apps/plug-ins will be given by Smartbooqing?
Below are the connectors which you need to have while using AFAS for Smartbooqing. For more details use the installation guide which you will be able to download while connecting to AFAS from Smartbooqing:
- CaseWare_Periods
- Infine_transacties
- Precal_Valuta
- Precal_Dagboeken
- Precal_Landen
- Precal_Betaalvoorwaarde
- DDI_Profit_Kostendragers
- DDI_Profit_Kostenplaatsen
- SBQ_Administratie
- SBQ_BTW
- SBQ_Crediteuren
- SBQ_Debiteuren
- SBQ_Grootboekrekeningen
- Profit_Subjects
- Profit_SubjectTypes
- Profit_Projects
2. Introduction:
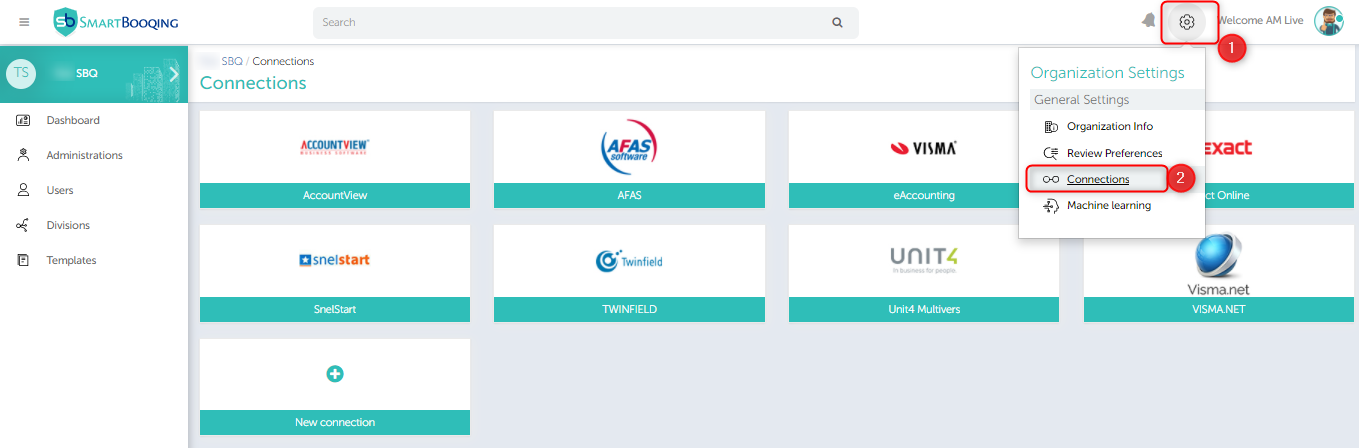
To create/add a new connection from Smartbooqing, you need to login to the Smartbooqing and then go to the organisation, in the organisation menu you will find the ‘Connections’ tab, as shown below-
3. Importing administrations from AFAS
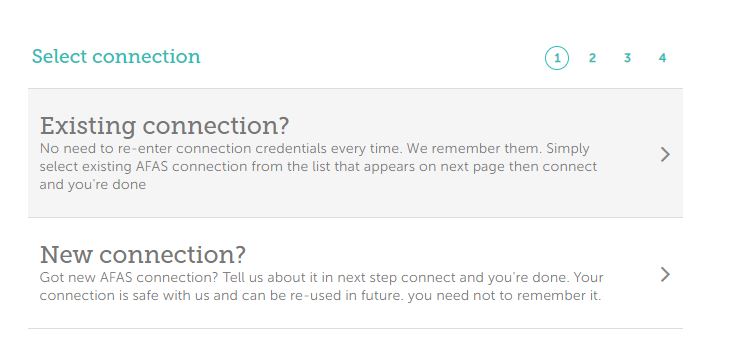
While importing the administrations from AFAS you can select the accounting system as AFAS and then choose the option to import either from ‘Existing connection’ or ‘New connection’.
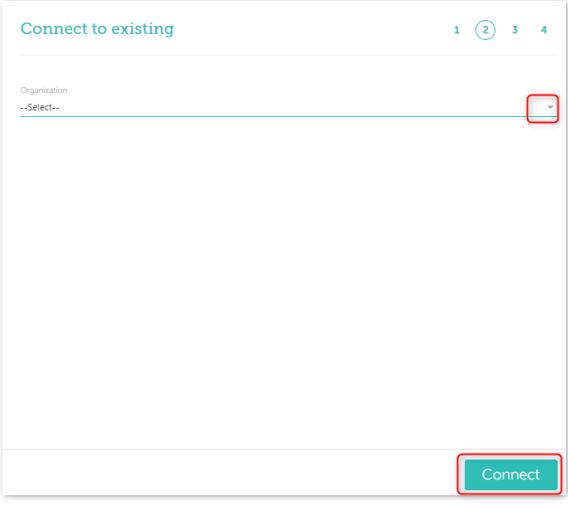
3.i. If existing connection:
Step 1:
If you select the existing connections the you are required to choose the organization from the dropdown list where you want to import the administrations as shown below, select the organization and click ‘Connect’-
Step 2:
After this you can select the desired administrations to import by selecting them as shown in the below screen, once you click the ‘Next’ you go to the next screen-

Step 3:
- On click of next you will be able to see the below screen and you are required to enter the COC number or sector.
- If you don’t have the COC then you are required to give the reason for not having the COC (you can select ‘Not a company or test/Demo) and select Sector.

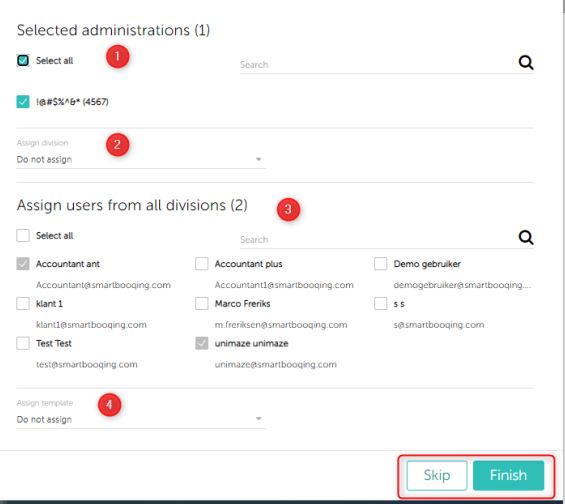
Step 4:
- Next screen is bulk assignment where you can assign your administrations to Users, Templates, or Divisions.
- Steps:
- Select administrations (By default all are selected)
- Assign Division
- Assign users:
- By default, all the newly added administrations are assigned to all ‘Administrators’.
- Assign template
- This step is not mandatory, can be skipped.
- Once done; you will be notified with below image.
3.ii. If new connection:
Step1:
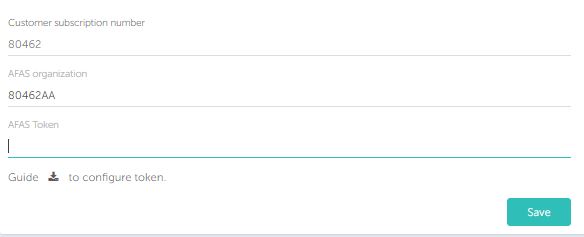
While importing the administrations from the new connection you need to enter the below details like:
- Customer subscription number
- AFAS organization
- AFAS token (if required you can also download the guide to configure the token)
Step 2:
After downloading this, the entire flow (3. i steps 2, step 3, step 4) will remain the same.